SUCCESS FACTORS EMPLOYEE CENTRAL :: Mass Change Functionality
Mass Changes is a tool for HR Administrators to manage changes to employees' job information and job relationships for any user-defined selection of employees. It allows users to efficiently execute changes to employees' attributes due to manager reassignments, or reorganizations affecting large numbers of employees. Example: The HR Manager responsible for 40 employees is replaced by another person. All engineers decentralized in several departments are being centralized in a newly created unit.
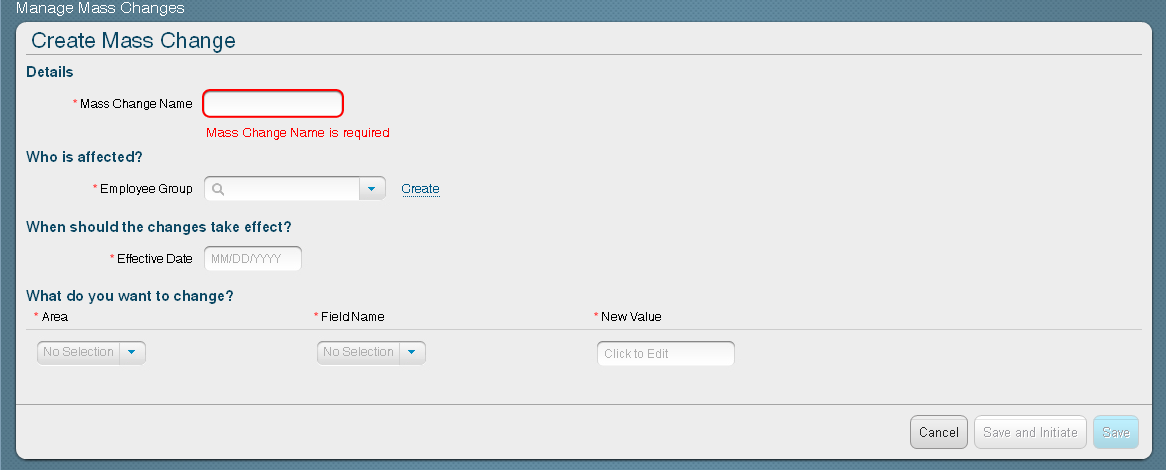
The user defines a mass change in a screen consisting of:
● An employee selection using a group definition tool similar to the one that are used for permissions.
● The effective date that determines when the determined changes should take effect.
● The list of fields to be changed, including their new value.
The mass change definition can then be saved and initiated immediately or saved and initiated later. Initiating a mass change creates a background job that is scheduled for immediate execution. After mass change has run, a new status is set, dependent on the result. In the event of errors, the user can access a log to analyze the changes that failed.
1. Provisioning
- Company Settings
Select Enable Generic Objects
2. Admin – Permission to Generic Objects
Grant permission to Manage Generic Objects to Admin user.
Goto Admin Tools à
Role Based permission à
Manage Permission Roles.

3. Role Based Permissions for Mass Changes
Grant permission to Manage Mass Changes to Admin user in
Role Based Permissions FrameWork.


Select Create New
Create or Select an Employee Group.
For Job Information changes, Event Reason has to be defined
in the Mass Change definition


